Building a Low-Maintenance Pollinator Garden

You'll learn how to design, plant, and maintain a garden that supports bees, butterflies, and birds without requiring hours of constant weeding or watering. This guide covers soil preparation, plant selection for biodiversity, and the specific tools you need to build a self-sustaining ecosystem in your own backyard.
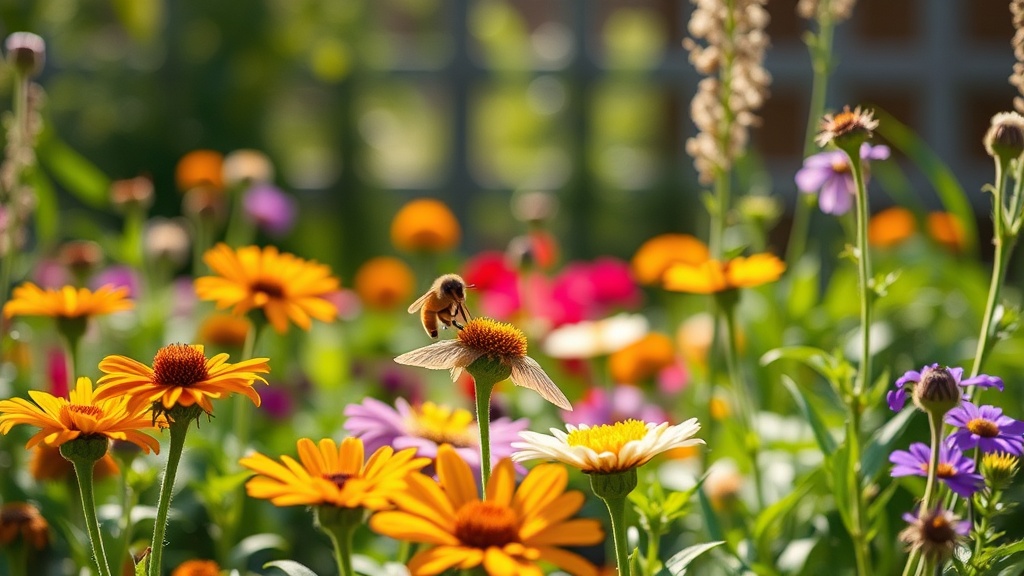
What Plants Should I Grow for Pollinators?
The best plants for pollinators are native species that provide nectar, pollen, and habitat specific to your local region. You shouldn't just pick pretty flowers; you need to look at the functional parts of the plant. For example, some flowers offer high nectar volumes, while others provide the protein-rich pollen that bees need to raise their young.
If you're living in a much cooler climate like Detroit, you'll want to prioritize perennials that can handle a hard freeze. I always suggest looking at the National Wildlife Federation's native plant finder to ensure you aren't accidentally planting invasive species that actually harm the local environment.
Here are a few reliable categories to include in your design:
- Nectar-Rich Perennials: Coneflowers (Echinacea), Black-eyed Susans (Rudbeckia), and Bee Balm (Monarda).
- Host Plants: Milkweed (Asclepias) is the only food source for Monarch butterfly caterpillars—don't skip this if you want butterflies.
- Early Bloomers: Hellebores or Willows provide much-needed food when the weather is still chilly.
- Late Bloomers: Asters and Goldenrod keep the energy flowing into the autumn months.
A quick tip: try to group plants with similar water needs together. It's a waste of time to plant a water-loving plant right next to a drought-tolerant one (and it usually ends in a dead plant).
How Much Does a Pollinator Garden Cost to Build?
A pollinator garden can cost anywhere from $200 to over $2,000 depending on the size of your yard and whether you buy mature plants or seeds. Most of your budget will go toward the initial plant purchase and soil amendments. Once the plants are established, the ongoing costs drop significantly.
To keep things affordable, I recommend buying seeds rather than "starts" or nursery-grown plants whenever possible. It's much cheaper to scatter a packet of wildflower seeds than to buy twelve individual pots from a big-box store. That said, if you want immediate results, buying established perennials is the way to go.
| Item Type | Estimated Cost (Low) | Estimated Cost (High) | Time to Impact |
|---|---|---|---|
| Seed Packets | $15 | $50 | 1-2 Seasons |
| Nursery Starters | $150 | $600 | Immediate |
| Soil & Compost | $40 | $150 | 1 Season |
| Garden Tools | $30 | $200 | N/A |
Don't forget to factor in the cost of organic fertilizer. I'm a big fan of using Espoma Organic products because they feed the soil microbes rather than just giving a quick chemical hit to the leaves. It's a long-term investment in your soil health.
How Do I Prepare My Soil for Native Plants?
To prepare your soil, you must test the pH and remove any existing grass or weeds that will compete with your new arrivals. Most native plants actually prefer "lean" soil, meaning you don't want to over-fertilize it with heavy, nitrogen-rich chemicals. In fact, too much fertilizer can actually make your plants grow too fast and become weak or prone to pests.
First, clear the area. You can use the "sheet mulching" method—layering cardboard over grass and covering it with compost—to kill weeds without using harsh herbicides. It's a bit of a slow process, but it's much better for the earth. Once the cardboard has decomposed, you have a perfect, weed-free bed ready for planting.
Next, add a layer of organic compost. This provides a slow release of nutrients. If you're using a heavy clay soil (common in many urban areas), adding compost helps with drainage. If you have sandy soil, it helps retain moisture. It's all about balance.
One thing to watch out for: avoid using standard "weed and feed" products. These are often toxic to the very insects you're trying to attract. If you need to manage a specific pest, look for OMRI-listed organic solutions instead.
Essential Tools for Success
You don't need a shed full of expensive gear. A few quality items will do the job perfectly. I personally use a Fiskars bypass pruner for deadheading flowers and a standard Hori Hori knife for planting in dense soil. These tools are durable and won't break the bank.
- A sturdy trowel: For digging small holes for individual plants.
- A garden rake: To level your soil and distribute mulch.
- A watering can or hose with a spray nozzle: Gentle water pressure is key so you don't wash away seeds or disturb new roots.
- Pruning shears: To keep your plants tidy and encourage new growth.
The goal here is to work with nature, not against it. If a plant looks a little ragged, don't panic. A "perfect" garden is often a sterile one. A little bit of wildness is exactly what the bees are looking for.
How Much Maintenance Does a Pollinator Garden Require?
A well-established pollinator garden requires very little maintenance, typically only a few hours of work per month during the growing season. The more "natural" the garden is, the less you'll need to do. If you try to keep it looking like a manicured English garden, you'll be fighting a losing battle against the elements.
In the first year, your primary job is watering and weeding. Once the roots are deep, the plants will mostly take care of themselves. You'll need to "deadhead" (remove spent flowers) occasionally to encourage more blooms, but don't overdo it. Leaving some dried seed heads in the fall is actually a great way to provide winter food for birds.
Here's the thing: if you see a few weeds, don't reach for the chemical spray. Most of them won't bother the pollinators. Just pull the ones that are truly choking out your new plants. It's a much more relaxed way to garden.
It's also worth noting that a "low-maintenance" garden still needs a watchful eye. Check your plants for signs of disease or unexpected pests every few weeks. Most of the time, a quick spray of water or a bit of organic neem oil will solve the problem before it gets out of hand.
The beauty of this approach is that it becomes a cycle. You plant, the plants grow, the insects arrive, and the garden sustains itself. It's a way to give back to the local ecosystem without it becoming a second full-time job.