Composting 101: Turn Kitchen Scraps into Garden Gold

Composting transforms everyday kitchen scraps and yard waste into nutrient-rich soil amendment that feeds gardens, reduces landfill waste, and cuts down on chemical fertilizer needs. This guide covers everything needed to start composting at home — from choosing the right bin to troubleshooting common problems — with practical advice for beginners ready to turn waste into garden gold.
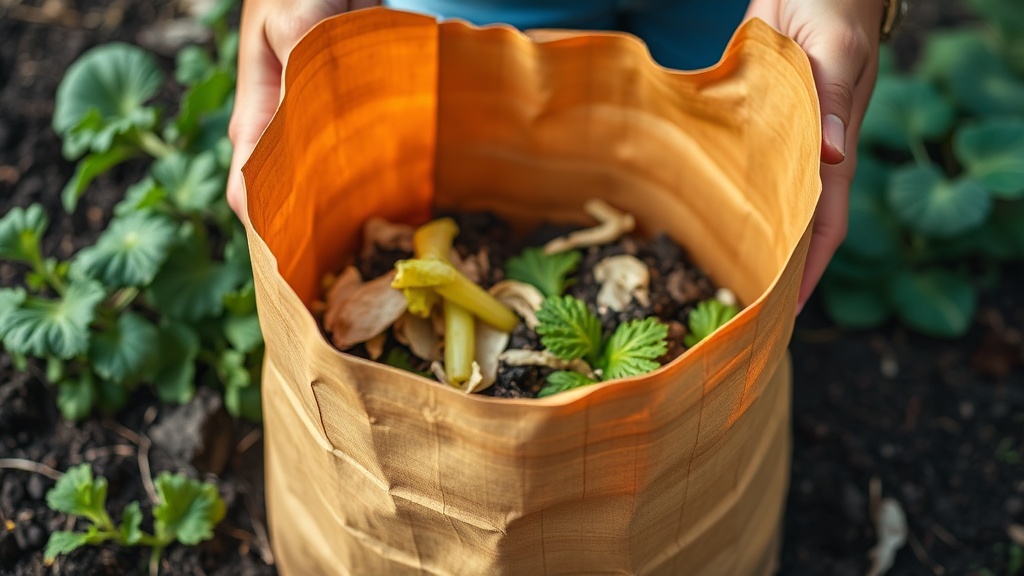
What Can You Compost at Home?
Almost any organic material breaks down eventually, but successful composting requires balancing "green" nitrogen-rich materials with "brown" carbon-rich ingredients. Greens provide protein for the microorganisms doing the decomposition work, while browns supply energy and help maintain airflow through the pile.
Green materials (nitrogen sources):
- Fruit and vegetable scraps
- Coffee grounds and filters
- Fresh grass clippings
- Plant trimmings
- Eggshells (crushed)
Brown materials (carbon sources):
- Dried leaves
- Shredded newspaper and cardboard
- Dried grass clippings
- Wood chips and sawdust
- Straw and hay
The ideal carbon-to-nitrogen ratio sits around 30:1 — that's roughly three parts browns to one part greens by volume. Too many greens create a soggy, smelly mess. Too many browns slow decomposition to a crawl. The sweet spot? Think of it like making a layered cake rather than tossing everything into a heap.
Worth noting: some materials belong nowhere near a home compost pile. Meat, dairy, and oily foods attract pests and create foul odors. Diseased plants can spread pathogens. Pet waste (except from herbivores like rabbits) harbors parasites and bacteria you don't want near edible crops. Weeds that have gone to seed? They'll survive the composting process and come back to haunt the garden.
What's the Best Compost Bin for Beginners?
The best compost bin depends on available space, budget, and how hands-on you want to be with the process. Urban gardeners in Detroit working with small backyards have different needs than someone with five acres in the country.
Here's the thing — you don't need fancy equipment to start. A simple wire bin made from hardware store fencing works fine. That said, enclosed systems offer advantages for city dwellers dealing with raccoons, rats, or nosy neighbors.
| Bin Type | Best For | Price Range | Turning Required |
|---|---|---|---|
| Wire mesh bin | Budget-conscious beginners | $15-$40 | Manual |
| Plastic tumbler (FCMP Outdoor IM4000) | Small spaces, fast results | $80-$150 | Rotating handle |
| Wooden pallet bin | DIY enthusiasts with space | $0-$50 | Manual |
| Vermicomposting bin (Worm Factory 360) | Apartments, year-round use | $100-$130 | None |
| Bokashi bucket system | Meat/dairy composters | $50-$80 | None |
The FCMP Outdoor IM4000 Tumbling Composter deserves special mention for beginners. Its dual-chamber design lets one side cook while the other fills, producing finished compost every few weeks rather than months. The rotating mechanism makes turning effortless — a task many beginners neglect with static bins.
For apartment dwellers without outdoor space, vermicomposting (worm composting) using the Worm Factory 360 produces odor-free castings indoors. Red wiggler worms eat kitchen scraps and paper, creating what gardeners call "black gold" — worm castings richer than traditional compost. The catch? Worms need temperatures between 55-77°F, making them tricky to keep in unheated garages during Detroit winters.
How Long Does Compost Take to Break Down?
Active "hot" composting produces finished material in 4-8 weeks. Passive "cold" composting takes 6-12 months. The difference comes down to management — specifically, turning frequency, moisture control, and particle size.
Hot composting requires more attention but rewards the effort with faster results and higher temperatures that kill weed seeds and pathogens. To achieve hot composting:
- Chop materials into small pieces — a Fiskars 9-inch PowerGear2 Pruner makes quick work of branches and tough stems
- Maintain moisture like a wrung-out sponge
- Turn the pile weekly to introduce oxygen
- Monitor temperature (aim for 130-150°F in the center)
That said, not everyone has time for weekly turning. Cold composting works fine if you're patient. Nature decomposes everything eventually — forest floors don't get turned, yet they produce rich humus over time. The trade-off? You'll wait longer, and those volunteer tomato plants from last year's rotten fruit might surprise you.
Worth noting: shredding materials dramatically speeds decomposition. A Sun Joe CJ601E electric wood chipper handles small branches and leaves, increasing surface area for microorganisms to work. Whole leaves mat together and take forever. Shredded leaves disappear in weeks.
How Do You Know When Compost Is Ready?
Finished compost smells earthy (not sour or ammonia-like), appears dark brown to black, and crumbles easily in your hands. Original materials should be unrecognizable — no visible banana peels or leaf fragments remain. The volume reduces by about 50% from what went in.
Using immature compost damages plants. Partially decomposed material continues breaking down in soil, temporarily tying up nitrogen that plants need. Spread unfinished compost around vegetables, and they'll yellow and stall — a rookie mistake that's heartbreaking after months of careful tending.
Here's a simple test: seal a handful of compost in a plastic bag for 48 hours. Open it and sniff. Earthy goodness means it's ready. Ammonia or sour smells? Give it more time and another turn.
Sifting and Storing Finished Compost
A Gardeners Supply Company Compost Sieve separates coarse unfinished material from fine, finished compost. Return the chunky stuff to the active pile and use the fine material in gardens. Store finished compost in covered bins or under tarps — nutrients leach away if rain constantly washes through.
Troubleshooting Common Compost Problems
Even experienced composters encounter issues. Most problems stem from imbalance — too wet, too dry, too compacted, or lacking nitrogen.
Smelly, slimy pile: Too many greens, not enough browns. Mix in dry leaves, shredded paper, or sawdust. Turn to aerate.
Dry and not decomposing: Add water while turning — the pile should feel like a damp sponge. Cover with tarp during dry spells.
Attracting rodents: Bury food scraps under browns. Avoid meat, dairy, and oils. Use enclosed bin with tight-fitting lid.
Ants everywhere: The pile's too dry. Water thoroughly and turn. Ants prefer arid conditions.
The EPA's guide to home composting offers detailed troubleshooting for persistent issues. Their resources cover everything from indoor worm bins to large backyard systems.
Using Compost in the Garden
Finished compost works as soil amendment, mulch, or ingredient in potting mixes. For vegetable beds, spread 2-3 inches across the surface and dig it in before planting. Established perennials appreciate a 1-inch ring of compost around their base — keep it a few inches from stems to prevent rot.
Compost tea (steeping compost in water) creates liquid fertilizer. Fill a burlap sack with finished compost, submerge in a 5-gallon bucket of water for 2-3 days, then use the strained liquid to water plants. It's free fertilizer made from waste.
For container gardeners, mix one part compost with two parts quality potting soil. Straight compost retains too much water and can burn roots with concentrated nutrients. Brands like Espoma Organic Potting Mix blend compost with peat moss and perlite for optimal container performance.
That said, don't go overboard. More compost isn't always better. Annual vegetables need yearly replenishment, but perennial borders and established trees rarely need additional compost once soil improves. Test soil every few years — over-amended gardens can develop phosphorus or potassium imbalances that cause more problems than they solve.
Start small. Even a single bin handling kitchen scraps and fall leaves makes a difference. The satisfaction of growing tomatoes in soil enriched by last year's coffee grounds and banana peels? There's nothing quite like it.