How to Start a Backyard Compost Bin in 3 Easy Steps

This post walks through exactly how to start a backyard compost bin in three straightforward steps—selecting the right setup, balancing materials, and keeping the pile active. Composting at home cuts household waste by up to 30 percent, reduces landfill methane emissions, and produces rich, dark humus that improves soil structure without synthetic fertilizers. Whether you have a sprawling yard in Grosse Pointe or a modest patio in Midtown Detroit, there's a composting method that fits the space.
Step 1: Pick a Bin and a Spot
The first decision is simple: open pile or enclosed bin? An open pile costs nothing and works well on large, rural lots, but it attracts wildlife and dries out fast. For most suburban and urban backyards, an enclosed bin is the smarter bet. It keeps raccoons out, retains moisture, and looks tidier near a patio or vegetable garden.
Placement matters. Choose a flat, well-draining area with partial sun—ideally within a short walk of the kitchen door so you actually use it. Morning sun warms the pile and speeds decomposition, but blazing afternoon heat can dry it out. Keep the bin at least two feet away from wooden fences to prevent rot, and make sure there's access to a hose.
Here are three solid options worth considering:
- FCMP Outdoor IM4000 Tumbling Composter — A dual-chamber tumbler that sits on a frame and spins for easy aeration. Great for small yards. No tools needed to turn the pile.
- Redmon Green Culture Compost Bin — An affordable stationary bin with a snap-on lid and four access doors at the base. Best for beginners who want volume without a high price tag.
- Miracle-Gro Small Composter — A compact single-chamber tumbler designed for patios and balconies. Holds 18.5 gallons and assembles in about ten minutes.
If you're in Detroit or anywhere with cold winters, a tumbler has an edge. improved chambers thaw faster in spring and stay active longer in fall. That said, a simple black plastic bin from a local hardware store will still do the job—just expect slower breakdown from December through March.
What Can You Put in a Backyard Compost Bin?
You can compost fruit and vegetable scraps, coffee grounds, eggshells, yard trimmings, shredded newspaper, untreated wood chips, and fallen leaves. The key is balancing "greens" (nitrogen-rich, wet materials) with "browns" (carbon-rich, dry materials). Get the ratio wrong and you'll end up with a soggy, stinky mess or a pile that sits unchanged for months.
Think of greens as the fuel that heats the pile—browns are the structure that keeps it airy. A good rule of thumb is three to four parts browns for every one part greens by volume. (Weight doesn't matter much here—volume is easier to eyeball.)
Greens to add:
- Vegetable peels and scraps
- Coffee grounds and paper filters
- Fresh grass clippings
- Plant trimmings from the garden
- Crushed eggshells
Browns to add:
- Dried leaves
- Shredded cardboard and newspaper
- Straw or hay
- Sawdust from untreated wood
- Dried pine needles
Some items should stay out entirely. Meat, dairy, and oily foods break down slowly, draw pests, and produce foul odors. Pet waste can harbor pathogens. Diseased plants may survive the composting process and reinfect next year's tomatoes. And glossy paper or coated cardboard often contains plastics and heavy metals you don't want in vegetable beds.
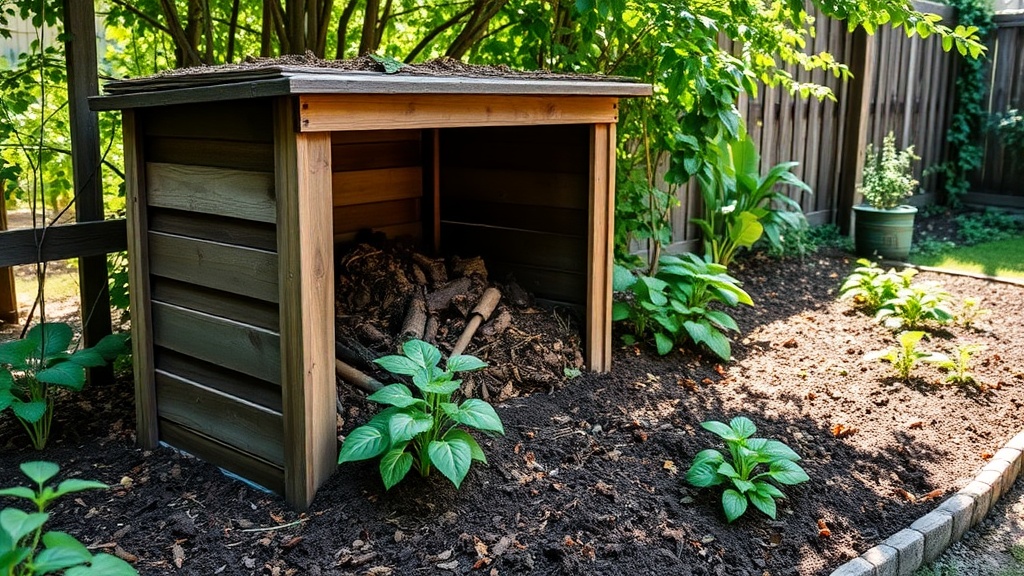
Step 2: Build the Pile in Layers
Once the bin is in place, start with a four- to six-inch layer of coarse browns—small twigs, straw, or torn cardboard. This bottom layer creates airflow from underneath and prevents the pile from turning anaerobic. Next, add a two- to three-inch layer of greens, followed by another browns layer. Repeat until the bin is roughly half to two-thirds full.
Water each layer as you go. The ideal moisture level feels like a wrung-out sponge—damp but not dripping. Squeeze a handful; a few drops of water should appear, but it shouldn't run down your wrist. Too dry? The microbes go dormant. Too wet? They suffocate and the pile starts to smell like rotten eggs.
Here's the thing: chopping materials into smaller pieces makes a real difference. A whole banana peel might take three weeks to break down; a diced one disappears in half that time. Tear cardboard into palm-sized pieces. Shred newspaper rather than tossing in whole sheets. The increased surface area gives bacteria and fungi more room to work.
For kitchen scraps, keep a small countertop collector handy. The Epica Stainless Steel Compost Bin holds 1.3 gallons, has a charcoal filter to trap odors, and looks decent enough to leave on the counter. Empty it into the backyard bin every two to three days so fruit flies don't stage a takeover.
How Long Does Compost Take to Break Down?
Hot, actively managed compost can be ready in two to four months. A cold, passive pile typically takes six months to a year. The difference comes down to four factors: particle size, moisture, aeration, and the carbon-to-nitrogen ratio.
A hot pile reaches temperatures between 130°F and 160°F, which kills most weed seeds and pathogens. To get there, turn the pile weekly with a pitchfork or compost aerator. This introduces oxygen and redistributes materials so nothing stays soggy or dry for long. If the temperature drops below 100°F, it's usually a sign the pile needs more greens or a good stir.
Cold composting is the "set it and forget it" approach. Materials still decompose—they just do so at ambient temperatures driven by soil organisms and earthworms. The trade-off is time and less reliable pathogen destruction. For flower beds and shrubs, cold compost is perfectly fine. For vegetable gardens, hot compost offers more peace of mind.
| Factor | Hot Composting | Cold Composting |
|---|---|---|
| Time to finished compost | 2–4 months | 6–12 months |
| Effort required | Weekly turning | Minimal |
| Temperature | 130°F–160°F | Ambient |
| Weed seed kill | High | Low |
| Best use | Vegetable gardens | Ornamentals and trees |
Worth noting: even in Michigan's variable climate, a well-built pile stays active longer than most people expect. Insulating the bin with straw bales in late fall can extend the hot phase into December.
Step 3: Turn, Monitor, and Harvest
Maintenance doesn't have to be complicated. Once a week, plunge a compost aerator—or an old shovel—into the pile and lift from the bottom. The goal is to move outer materials toward the center and break up any dense clumps. If you own a tumbler like the FCMP Outdoor IM4000, five spins every few days does the same job.
Watch for warning signs. A pile that smells like ammonia has too many greens; add dry leaves or shredded cardboard. A pile that smells like sulfur is too wet and lacks oxygen; turn it aggressively and mix in coarse browns. If nothing seems to be happening, the pile might be too dry—water it and check for compacted layers.
Finished compost looks like dark, crumbly topsoil and smells earthy—like a forest floor after rain. Most of the original materials will be unrecognizable, though you might spot a few woody chunks or eggshell fragments. Screen the compost through a half-inch mesh if you want a finer texture for seed starting. The coarse leftovers can go right back into the active pile.
Harvest by scooping from the bottom of a stationary bin or dumping out a tumbler. In a two-chamber tumbler, fill one side while the other finishes curing. In a single-bin setup, stop adding fresh materials for a few weeks, then dig from the base while leaving the top layer to keep cooking.
Do Compost Bins Attract Rats and Flies?
They don't have to. A properly managed compost bin rarely draws pests. The biggest mistake that invites trouble is adding meat, dairy, or oily foods—or leaving the lid off so rodents can raid it. Enclosed bins with tight-fitting lids and half-inch hardware cloth on ventilation holes solve most problems before they start.
Fruit flies usually mean kitchen scraps are sitting too long on the counter or greens are exposed on top of the pile. Bury fresh additions under a two-inch layer of browns, and keep the kitchen collector sealed between trips. If flies do show up, stop adding greens for a week, turn the pile to disrupt breeding, and cover the surface with damp newspaper or grass clippings.
The catch? Location matters more than people think. Don't place the bin directly against the house or under a bird feeder. Seed hulls and spilled feed are a buffet for mice and rats. A spot in the middle of the yard—ten to fifteen feet from structures—is ideal.
"Composting is one of the simplest ways to shrink your environmental footprint while building healthier soil. The EPA estimates that food and yard waste make up more than 30 percent of what Americans throw away, most of which could be composted instead." — U.S. Environmental Protection Agency
For readers who want to dive deeper into carbon-to-nitrogen science, the Rodale Institute publishes excellent research on thermal composting and microbial activity. If you're unsure whether a specific material is safe for your pile, Michigan State University Extension maintains a searchable database of compostable items from A to Z tailored to Midwest climates.
Noémie Campbell runs sustainablespace.blog from Detroit, where she's been testing compost methods in clay-heavy urban soil since 2019.
Steps
- 1
Choose a Shady Spot and Set Up Your Bin
- 2
Layer Green and Brown Materials Properly
- 3
Turn, Water, and Harvest Your Compost