Why Your Backyard Needs a Native Plant Nursery

Creating a Small-Scale Native Plant Nursery at Home
This post explains how to establish a dedicated space for propagating native plants, why native species are better for your local ecosystem, and the practical steps needed to transition from a standard garden to a self-sustaining nursery. You'll learn how to select the right parent plants, manage seed collection, and create a controlled environment for young seedlings to thrive.
Most gardeners focus on buying finished plants from a nursery, but there is a much deeper satisfaction in growing your own from seed or cuttings. A native plant nursery isn't just about saving money; it's about building a localized genetic bank that actually belongs in your corner of the world. When you grow native plants, you aren't just gardening—you're providing food and habitat for the specific insects and birds that live in your neighborhood.
Starting this process requires a shift in how you view your backyard. Instead of seeing a weed or a wild seedling as something to be pulled, you start seeing it as a potential future plant. This requires patience and a bit of a different toolkit. You won't need heavy machinery, but you will need a few specific containers, a bit of shade, and a willingness to let things get a little messy.
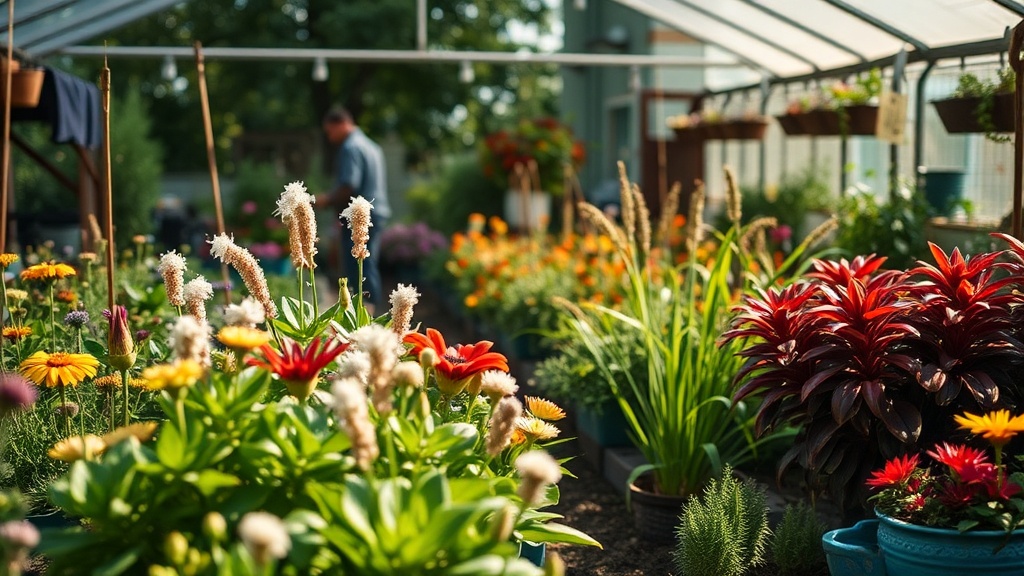
How do I start a native plant nursery in a small space?
You don't need an acre of land to start a nursery. In fact, even a small corner of a porch or a few sturdy pots on a patio can serve as a staging ground for new life. The first step is selecting your "mother plants." These are the established plants in your yard that are healthy, vigorous, and producing plenty of flowers or seeds. If you have a healthy milkweed or a strong cone flower, that's your starting point.
To begin, you'll want to gather basic supplies. A few seed trays, some high-quality organic potting soil, and a collection of containers are your best friends. Since many native seeds require specific conditions to germinate—sometimes even a period of cold to wake them up—you might want to look into the concept of stratification. For example, many native perennials need a winter chill to trigger growth. You can actually do this in a refrigerator or by leaving seeds out in the elements if your garden setup allows for it.
Once you have your seeds or cuttings, the goal is to provide a stable environment. A small greenhouse kit or even a simple clear plastic dome over a tray can help maintain humidity. However, don't overdo it. Native plants are often more resilient than the pampered hybrids you find at big-box stores, so they don't always need the constant humidity that tropical plants crave. The goal is to get them strong enough to survive the transition to the outdoor soil.
Which plants are best for beginner native gardeners?
If you're feeling overwhelmed by the sheer variety of species, stick to the basics. Look for plants that are easy to identify and have a long history in your region. For many, this means starting with common perennials that have high success rates in seed form. Audubon often highlights how specific plants support specific bird populations, which is a great way to choose your species.
- Milkweeds (Asclepias): key for monarch butterflies.
- Coneflowers (Echinacea): Hardy, beautiful, and great for bees.
- Blazing Stars (Liatris): Tall, striking, and very resilient.
- Goldenrod (Solidago): A late-season powerhouse for pollinators.
These plants are generally much more forgiving than exotic ornamentals. They are built for your local weather patterns, meaning they can handle the heat of July or the frost of October without much fuss. When you're choosing your "beginner" list, check your local regional plant list to ensure you aren't accidentally introducing an invasive species that looks native but actually chokes out the local flora.
How often should I water my young native seedlings?
This is where most people struggle. Young plants in containers or seed trays have very little root structure, so they are much more vulnerable to drying out than a plant established in the ground. You'll want to check the soil moisture daily. If the top inch of soil feels dry to the touch, it's time to water. However, be careful not to drown them; standing water in a tray can lead to damping off, a fungal disease that kills young seedlings.
<A good technique is to water at the base of the plant rather than overhead. This keeps the foliage dry and reduces the risk of disease. If you're using a greenhouse setup, you might find that you only need to water every few days, but during a heatwave, you might need to do it every morning. Using a spray bottle for the most delicate stages can help keep the moisture consistent without washing the seeds away.
As these plants grow and you move them from the nursery to the garden, the watering needs will change. This is the transition from a controlled environment to the real world. You'll want to gradually introduce them to more wind and sun, a process often called "hardening off." This prevents the sudden change from shocking the plant and causing it to wilt or die.
A Quick Reference for Nursery Management
| Task | Frequency | Key Tip |
|---|---|---|
| Checking Moisture | Daily | Touch the soil to check depth. |
| Thinning Seedlings | Every 2 weeks | Remove the weakest to let others grow. |
| Monitoring Pests | Weekly | Look under leaves for aphids or mites. |
| Hardening Off | Once per week | Increase sun exposure gradually. |
Building this kind of cycle in your backyard is deeply rewarding. You aren't just growing plants; you're growing a piece of the local ecosystem. Each season, as you harvest seeds and start new batches, you're creating a cycle of life that supports the birds, the bees, and the very ground you stand on. It's a small way to make a big difference right from your own back door.